Run tests and test documentation
Estimated reading time: 12 minutesContributing includes testing your changes. If you change the Docker code, you may need to add a new test or modify an existing one. Your contribution could even be adding tests to Docker. For this reason, you need to know a little about Docker’s test infrastructure.
Many contributors contribute documentation only. Or, a contributor makes a code contribution that changes how Docker behaves and that change needs documentation. For these reasons, you also need to know how to build, view, and test the Docker documentation.
This section describes tests you can run in the dry-run-test branch of your Docker
fork. If you have followed along in this guide, you already have this branch.
If you don’t have this branch, you can create it or simply use another of your
branches.
Understand testing at Docker
Docker tests use the Go language’s test framework. In this framework, files
whose names end in _test.go contain test code; you’ll find test files like
this throughout the Docker repo. Use these files for inspiration when writing
your own tests. For information on Go’s test framework, see Go’s testing package documentation and the go test help.
You are responsible for unit testing your contribution when you add new or change existing Docker code. A unit test is a piece of code that invokes a single, small piece of code ( unit of work ) to verify the unit works as expected.
Depending on your contribution, you may need to add integration tests. These
are tests that combine two or more work units into one component. These work
units each have unit tests and then, together, integration tests that test the
interface between the components. The integration and integration-cli
directories in the Docker repository contain integration test code.
Testing is its own specialty. If you aren’t familiar with testing techniques, there is a lot of information available to you on the Web. For now, you should understand that, the Docker maintainers may ask you to write a new test or change an existing one.
Run tests on your local host
Before submitting a pull request with a code change, you should run the entire
Docker Engine test suite. The Makefile contains a target for the entire test
suite, named test. Also, it contains several targets for
testing:
| Target | What this target does |
|---|---|
test |
Run the unit, integration, and docker-py tests |
test-unit |
Run just the unit tests |
test-integration-cli |
Run the integration tests for the CLI |
test-docker-py |
Run the tests for the Docker API client |
Running the entire test suite on your current repository can take over half an hour. To run the test suite, do the following:
-
Open a terminal on your local host.
-
Change to the root your Docker repository.
$ cd docker-fork -
Make sure you are in your development branch.
$ git checkout dry-run-test -
Run the
make testcommand.$ make testThis command does several things, it creates a container temporarily for testing. Inside that container, the
make:- creates a new binary
- cross-compiles all the binaries for the various operating systems
- runs all the tests in the system
It can take approximate one hour to run all the tests. The time depends on your host performance. The default timeout is 60 minutes, which is defined in hack/make.sh(${TIMEOUT:=60m}). You can modify the timeout value on the basis of your host performance. When they complete successfully, you see the output concludes with something like this:
Ran 68 tests in 79.135s
Run targets inside a development container
If you are working inside a Docker development container, you use the
hack/make.sh script to run tests. The hack/make.sh script doesn’t
have a single target that runs all the tests. Instead, you provide a single
command line with multiple targets that does the same thing.
Try this now.
-
Open a terminal and change to the
docker-forkroot. -
Start a Docker development image.
If you are following along with this guide, you should have a
dry-run-testimage.$ docker run --privileged --rm -ti -v `pwd`:/go/src/github.com/docker/docker dry-run-test /bin/bash -
Run the tests using the
hack/make.shscript.root@5f8630b873fe:/go/src/github.com/docker/docker# hack/make.sh dynbinary binary cross test-unit test-integration-cli test-docker-pyThe tests run just as they did within your local host.
Of course, you can also run a subset of these targets too. For example, to run just the unit tests:
root@5f8630b873fe:/go/src/github.com/docker/docker# hack/make.sh dynbinary binary cross test-unitMost test targets require that you build these precursor targets first:
dynbinary binary cross
Run unit tests
We use golang standard testing package or gocheck for our unit tests.
You can use the TESTDIRS environment variable to run unit tests for
a single package.
$ TESTDIRS='opts' make test-unit
You can also use the TESTFLAGS environment variable to run a single test. The
flag’s value is passed as arguments to the go test command. For example, from
your local host you can run the TestBuild test with this command:
$ TESTFLAGS='-test.run ^TestValidateIPAddress$' make test-unit
On unit tests, it’s better to use TESTFLAGS in combination with
TESTDIRS to make it quicker to run a specific test.
$ TESTDIRS='opts' TESTFLAGS='-test.run ^TestValidateIPAddress$' make test-unit
Run integration tests
We use gocheck for our integration-cli tests.
You can use the TESTFLAGS environment variable to run a single test. The
flag’s value is passed as arguments to the go test command. For example, from
your local host you can run the TestBuild test with this command:
$ TESTFLAGS='-check.f DockerSuite.TestBuild*' make test-integration-cli
To run the same test inside your Docker development container, you do this:
root@5f8630b873fe:/go/src/github.com/docker/docker# TESTFLAGS='-check.f TestBuild*' hack/make.sh binary test-integration-cli
Test the Windows binary against a Linux daemon
This explains how to test the Windows binary on a Windows machine set up as a development environment. The tests will be run against a docker daemon running on a remote Linux machine. You’ll use Git Bash that came with the Git for Windows installation. Git Bash, just as it sounds, allows you to run a Bash terminal on Windows.
-
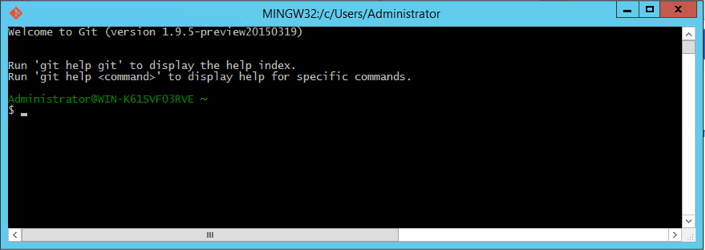
If you don’t have one open already, start a Git Bash terminal.

-
Change to the
dockersource directory.$ cd /c/gopath/src/github.com/docker/docker -
Set
DOCKER_REMOTE_DAEMONas follows:$ export DOCKER_REMOTE_DAEMON=1 -
Set
DOCKER_TEST_HOSTto thetcp://IP_ADDRESS:2376value; substitute your Linux machines actual IP address. For example:$ export DOCKER_TEST_HOST=tcp://213.124.23.200:2376 -
Make the binary and run the tests:
$ hack/make.sh binary test-integration-cliSome tests are skipped on Windows for various reasons. You can see which tests were skipped by re-running the make and passing in the
TESTFLAGS='-test.v'value. For example$ TESTFLAGS='-test.v' hack/make.sh binary test-integration-cliShould you wish to run a single test such as one with the name ‘TestExample’, you can pass in
TESTFLAGS='-check.f TestExample'. For example$ TESTFLAGS='-check.f TestExample' hack/make.sh binary test-integration-cli
You can now choose to make changes to the Docker source or the tests. If you make any changes, just run these commands again.
Build and test the documentation
The Docker documentation source files are in a centralized repository at https://github.com/docker/docker.github.io. The content is written using extended Markdown, which you can edit in a plain text editor such Atom or Notepad. The docs are built using Jekyll.
Most documentation is developed in the centralized repository. The exceptions are a project’s API and CLI references and man pages, which are developed alongside the project’s code and periodically imported into the documentation repository.
Always check your documentation for grammar and spelling. You can use an online grammar checker such as Hemingway Editor or a spelling or grammar checker built into your text editor. If you spot spelling or grammar errors, fixing them is one of the easiest ways to get started contributing to opensource projects.
When you change a documentation source file, you should test your change locally to make sure your content is there and any links work correctly. You can build the documentation from the local host.
Building the docs for docs.docker.com
You can build the docs using a Docker container or by using Jekyll directly. Using the Docker container requires no set-up but is slower. Using Jekyll directly requires you to install some prerequisites, but is faster on each build.
Using Docker Compose
The easiest way to build the docs locally on macOS, Windows, or Linux is to use
docker-compose. If you have not yet installed docker-compose,
follow these installation instructions.
In the root of the repository, issue the following command:
$ docker-compose up
This command will create and start service docs defined in docker-compose.yml,
which will build an image named docs/docstage and launch a container with Jekyll and all its dependencies configured
correctly. The container uses Jekyll to incrementally build and serve the site using the
files in the local repository.
Go to http://localhost:4000/ in your web browser to view the documentation.
The container runs in the foreground. It will continue to run and incrementally build the site when changes are detected, even if you change branches.
To stop the container, use CTRL+C.
To start the container again, use the following command:
$ docker-compose start docs
Using Jekyll directly
If for some reason you are unable to use Docker Compose, you can use Jekyll directly.
Prerequisites:
-
You need a recent version of Ruby installed. If you are on macOS, install Ruby and Bundle using homebrew.
brew install ruby brew install bundle -
Use
bundleto install Jekyll and its dependencies from the bundle in the centralized documentation repository. Within your clone of the https://github.com/docker/docker.github.io repository, issue the following command:bundle install
To build the website locally:
-
Issue the
jekyll servecommand. This will build the static website and serve it in a small web server on port 4000. If it fails, examine and fix the errors and run the command again. -
You can keep making changes to the Markdown files in another terminal window, and Jekyll will detect the changes and rebuild the relevant HTML pages automatically.
-
To stop the web server, issue
CTRL+C.
To serve the website using Github Pages on your fork, first
enable Github Pages in your fork or rename your fork
to <YOUR_GITHUB_USERNAME>.github.io, then push your
feature branch to your fork’s Github Pages branch, which is gh-pages or master,
depending on whether you manually enabled Github Pages or renamed your fork.
Within a few minutes, the site will be available on your Github Pages URL.
Review your documentation changes on the local or Github Pages site. When you are satisfied with your changes, submit your pull request.
Reviewing the reference docs for your project
Some projects, such as Docker Engine, maintain reference documents, such as man pages, CLI command references, and API endpoint references. These files are maintained within each project and periodically imported into the centralized documentation repository. If you change the behavior of a command or endpoint, including changing the help text, be sure that the associated reference documentation is updated as part of your pull request.
These reference documents are usually under the docs/reference/ directory or
the man/ directory. The best way to review them is to push the changes to
your fork and view the Markdown files in Github. The style will not match with
docs.docker.com, but you will be able to preview the changes.
Where to go next
Congratulations, you have successfully completed the basics you need to understand the Docker test framework. In the next steps, you use what you have learned so far to contribute to Docker by working on an issue.
 Feedback? Suggestions? Can't find something in the docs?
Edit this page ● Request docs changes ● Get support
Rate this page:
