
Get started with Docker for Windows
Estimated reading time: 26 minutesWelcome to Docker for Windows!
Docker is a full development platform for creating containerized apps, and Docker for Windows is the best way to get started with Docker on Windows systems.
Already have Docker for Windows? If you already have Docker for Windows installed, and are ready to get started, skip down to Step 3. Check versions of Docker Engine, Compose, and Machine to work through the rest of the Docker for Windows tour, or jump over to getting started tutorials at Learn Docker.
Download Docker for Windows
If you have not already done so, please install Docker for Windows. You can download installers from the stable or beta channel. For more about stable and beta channels, see the FAQs.
| Stable channel | Beta channel |
|---|---|
| This installer is fully baked and tested, and comes
with the latest GA version of Docker Engine along with
experimental features in Docker Engine, which are enabled
by default and configurable on
Docker Daemon settings for
experimental mode. This is the best channel to use if you want a reliable platform to work with. (Be sure to disable experimental features for apps in production.) These releases follow a version schedule with a longer lead time than the betas, synched with Docker Engine releases and hotfixes. On the stable channel, you can select whether to send usage statistics and other data. |
This installer provides the latest Beta release of
Docker for Windows, offers cutting edge features along with experimental features in Docker Engine, which are enabled
by default and configurable on
Docker Daemon settings for experimental mode. This is the best channel to use if you want to experiment with features under development, and can weather some instability and bugs. This channel is a continuation of the beta program, where you can provide feedback as the apps evolve. Releases are typically more frequent than for stable, often one or more per month. We collect all usage data on betas across the board. |
|
Get Docker for Windows (stable) Download checksum: InstallDocker.msi SHA256 |
Get Docker for Windows (beta) Download checksum: InstallDocker.msi SHA256 |
Important Notes:
Docker for Windows requires 64bit Windows 10 Pro, Enterprise and Education (1511 November update, Build 10586 or later) and Microsoft Hyper-V. Please see What to know before you install for a full list of prerequisites.
You can switch between beta and stable versions, but you must have only one app installed at a time. Also, you will need to save images and export containers you want to keep before uninstalling the current version before installing another. For more about this, see the FAQs about beta and stable channels.
What to know before you install
- README FIRST for Docker Toolbox and Docker Machine users: Docker for Windows requires Microsoft Hyper-V to run. After Hyper-V is enabled,
VirtualBox will no longer work, but any VirtualBox VM images will remain.
VirtualBox VMs created with
docker-machine(including thedefaultone typically created during Toolbox install) will no longer start. These VMs cannot be used side-by-side with Docker for Windows. However, you can still usedocker-machineto manage remote VMs.
- The current version of Docker for Windows runs on 64bit Windows 10 Pro, Enterprise and Education (1511 November update, Build 10586 or later). In the future we will support more versions of Windows 10.
- Containers and images created with Docker for Windows are shared between all user accounts on machines where it is installed. This is because all Windows accounts will use the same VM to build and run containers. In the future, Docker for Windows will better isolate user content.
- The Hyper-V package must be enabled for Docker for Windows to work. The Docker for Windows installer will enable it for you, if needed. (This requires a reboot). If your system does not satisfy these requirements, you can install Docker Toolbox, which uses Oracle Virtual Box instead of Hyper-V.
- Virtualization must be enabled. Typically, virtualization is enabled by default. (Note that this is different from having Hyper-V enabled.) For more detail see Virtualization must be enabled in Troubleshooting.
- Nested virtualization scenarios, such as running Docker for Windows on a VMWare or Parallels instance, might work, but come with no guarantees (i.e., not officially supported). For more information, see Running Docker for Windows in nested virtualization scenarios
- What the Docker for Windows install includes: The installation provides Docker Engine, Docker CLI client, Docker Compose, and Docker Machine.
About Windows containers and Windows Server 2016
Looking for information on using Windows containers?
- Switch between Windows and Linux containers describes the Linux / Windows containers toggle in Docker for Windows and points you to the tutorial mentioned above.
- Getting Started with Windows Containers (Lab) provides a tutorial on how to set up and run Windows containers on Windows 10 or with Windows Server 2016. It shows you how to use a MusicStore application with Windows containers.
- Setup - Windows Server 2016 (Lab) specifically describes environment setup.
- Docker Container Platform for Windows Server 2016 articles and blog posts on the Docker website
Step 1. Install Docker for Windows
-
Double-click
InstallDocker.msito run the installer.If you haven’t already downloaded the installer (
InstallDocker.msi), you can get it here. It typically downloads to yourDownloads folder, or you can run it from the recent downloads bar at the bottom of your web browser. -
Follow the install wizard to accept the license, authorize the installer, and proceed with the install.
You will be asked to authorize
Docker.appwith your system password during the install process. Privileged access is needed to install networking components, links to the Docker apps, and manage the Hyper-V VMs. -
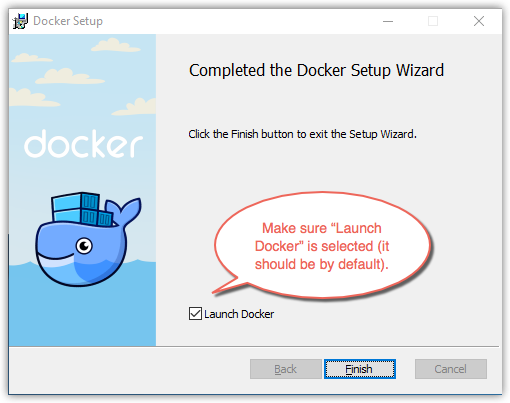
Click Finish on the setup complete dialog to launch Docker.
Step 2. Start Docker for Windows
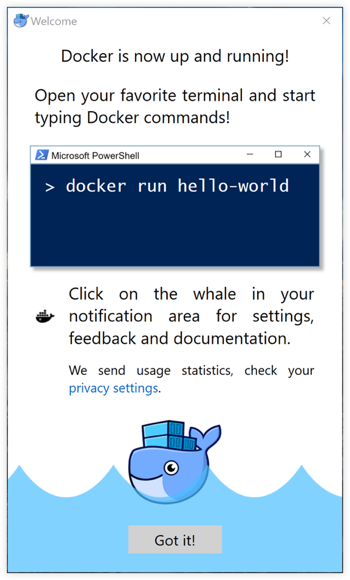
When the installation finishes, Docker starts automatically.
The whale in the status bar indicates that Docker is running, and accessible from a terminal.
If you just installed the app, you also get a popup success message with suggested next steps, and a link to this documentation.
When initialization is complete, select About Docker from the notification area icon to verify that you have the latest version.
Congratulations! You are up and running with Docker for Windows.
Step 3. Check versions of Docker Engine, Compose, and Machine
Start your favorite shell (cmd.exe, PowerShell, or other) to check your versions of docker and docker-compose, and verify the installation.
  PS C:\Users\jdoe> docker --version
  Docker version 1.12.0, build 8eab29e, experimental

  PS C:\Users\jdoe> docker-compose --version
  docker-compose version 1.8.0, build d988a55

  PS C:\Users\jdoe> docker-machine --version
  docker-machine version 0.8.0, build b85aac1
Step 4. Explore the application and run examples
The next few steps take you through some examples. These are just suggestions for ways to experiment with Docker on your system, check version information, and make sure docker commands are working properly.
-
Open a shell (
cmd.exe, PowerShell, or other). -
Run some Docker commands, such as
docker ps,docker version, anddocker info.Here is the output of
docker psrun in a powershell. (In this example, no containers are running yet.)PS C:\Users\jdoe> docker ps CONTAINER ID IMAGE COMMAND CREATED STATUS PORTS NAMESHere is an example of command output for
docker version.PS C:\Users\jdoe> docker version Client: Version: 1.13.0-rc3 API version: 1.25 Go version: go1.7.3 Git commit: 4d92237 Built: Tue Dec 6 01:15:44 2016 OS/Arch: windows/amd64 Server: Version: 1.13.0-rc3 API version: 1.25 (minimum version 1.12) Go version: go1.7.3 Git commit: 4d92237 Built: Tue Dec 6 01:15:44 2016 OS/Arch: linux/amd64 Experimental: trueHere is an example of command output for
docker info.PS C:\Users\jdoe> docker info Containers: 0 Running: 0 Paused: 0 Stopped: 0 Images: 0 Server Version: 1.13.0-rc3 Storage Driver: overlay2 Backing Filesystem: extfs Supports d_type: true Native Overlay Diff: true Logging Driver: json-file Cgroup Driver: cgroupfs Plugins: Volume: local Network: bridge host macvlan null overlay Swarm: inactive Runtimes: runc Default Runtime: runc Init Binary: docker-init containerd version: 03e5862ec0d8d3b3f750e19fca3ee367e13c090e runc version: 51371867a01c467f08af739783b8beafc154c4d7 init version: 949e6fa Security Options: seccomp Profile: default Kernel Version: 4.8.12-moby Operating System: Alpine Linux v3.4 OSType: linux Architecture: x86_64 CPUs: 2 Total Memory: 1.934 GiB Name: moby ID: EODE:VBXI:Y4EL:JXRJ:STRS:HCAI:LDLF:P4KW:B5XU:QPNE:LKTM:RG32 Docker Root Dir: /var/lib/docker Debug Mode (client): false Debug Mode (server): true File Descriptors: 13 Goroutines: 21 System Time: 2016-12-07T19:02:41.3287973Z EventsListeners: 0 Registry: https://index.docker.io/v1/ Experimental: true Insecure Registries: 127.0.0.0/8 Live Restore Enabled: falseNote: The outputs above are examples. Your output for commands like
docker versionanddocker infowill vary depending on your product versions (e.g., as you install newer versions). -
Run
docker run hello-worldto test pulling an image from Docker Hub and starting a container.PS C:\Users\jdoe> docker run hello-world Hello from Docker. This message shows that your installation appears to be working correctly. To generate this message, Docker took the following steps: 1. The Docker client contacted the Docker daemon. 2. The Docker daemon pulled the "hello-world" image from the Docker Hub. 3. The Docker daemon created a new container from that image which runs the executable that produces the output you are currently reading. 4. The Docker daemon streamed that output to the Docker client, which sent it to your terminal. -
Try something more ambitious, and run an Ubuntu container with this command.
PS C:\Users\jdoe> docker run -it ubuntu bashThis will download the
ubuntucontainer image and start it. Here is the output of running this command in a powershell.PS C:\Users\jdoe> docker run -it ubuntu bash Unable to find image 'ubuntu:latest' locally latest: Pulling from library/ubuntu 5a132a7e7af1: Pull complete fd2731e4c50c: Pull complete 28a2f68d1120: Pull complete a3ed95caeb02: Pull complete Digest: sha256:4e85ebe01d056b43955250bbac22bdb8734271122e3c78d21e55ee235fc6802d Status: Downloaded newer image for ubuntu:latestType
exitto stop the container and close the powershell. -
Start a Dockerized webserver with this command:
PS C:\Users\jdoe> docker run -d -p 80:80 --name webserver nginxThis will download the
nginxcontainer image and start it. Here is the output of running this command in a powershell.PS C:\Users\jdoe> docker run -d -p 80:80 --name webserver nginx Unable to find image 'nginx:latest' locally latest: Pulling from library/nginx fdd5d7827f33: Pull complete a3ed95caeb02: Pull complete 716f7a5f3082: Pull complete 7b10f03a0309: Pull complete Digest: sha256:f6a001272d5d324c4c9f3f183e1b69e9e0ff12debeb7a092730d638c33e0de3e Status: Downloaded newer image for nginx:latest dfe13c68b3b86f01951af617df02be4897184cbf7a8b4d5caf1c3c5bd3fc267f -
Point your web browser at
http://localhostto display the start page.(Since you specified the default HTTP port, it isn’t necessary to append
:80at the end of the URL.)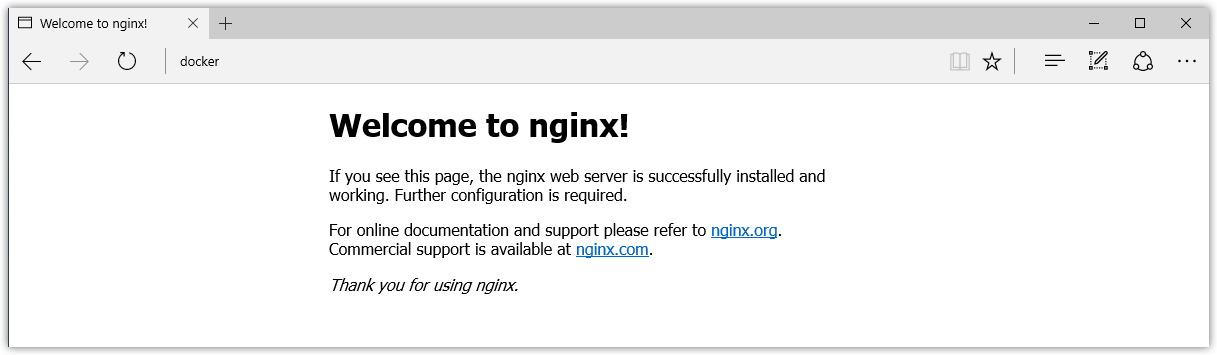
-
Run
docker pswhile your webserver is running to see details on the container.PS C:\Users\jdoe> docker ps CONTAINER ID IMAGE COMMAND CREATED STATUS PORTS NAMES dfe13c68b3b8 nginx "nginx -g 'daemon off" 3 days ago Up 45 seconds 0.0.0.0:80->80/tcp, 443/tc p webserver -
Stop or remove containers and images.
The
nginxwebserver will continue to run in the container on that port until you stop and/or remove the container. If you want to stop the webserver, type:docker stop webserverand start it again withdocker start webserver.To stop and remove the running container with a single command, type:
docker rm -f webserver. This will remove the container, but not thenginximage. You can list local images withdocker images. You might want to keep some images around so that you don’t have to pull them again from Docker Hub. To remove an image you no longer need, usedocker rmifollowed by an image ID or image name. For example,docker rmi nginx.
Want more example applications? - For more example walkthroughs that include setting up services and databases with Docker Compose, see Example Applications.
Set up tab completion in PowerShell
If you would like to have handy tab completion for Docker commands, you can
install the posh-docker
PowerShell Module as follows.
-
Start an “elevated” PowerShell (i.e., run it as administrator).
To do this, search for PowerShell, right-click, and choose Run as administrator.

When asked if you want to allow this app to make changes to your device, click Yes. -
Set the script execution policy to allow downloaded scripts signed by trusted publishers to run on your computer. To do so, type this at the PowerShell prompt.
Set-ExecutionPolicy RemoteSignedTo check that the policy is set properly, run
get-executionpolicy, which should returnRemoteSigned. -
To enable auto-completion of commands for the current PowerShell only, type:
Install-Module posh-docker -
To make tab completion persistent across all PowerShell sessions, add the command to a
$PROFILEby typing these commands at the PowerShell prompt.if (-Not (Test-Path $PROFILE)) { New-Item $PROFILE –Type File –Force } Add-Content $PROFILE "`nImport-Module posh-docker"This creates a
$PROFILEif one does not already exist, and adds this line into the file:Import-Module posh-dockerTo check that the file was properly created, or simply edit it manually, type this in PowerShell:
Notepad $PROFILE
Now, when you press tab after typing the first few letters, Docker commands such
as start, stop, run, and their options, along with container and image
names should now auto-complete.
Docker Settings
When Docker is running, the Docker whale is displayed. By default, the Docker whale icon is placed in the Notifications area. If it is hidden, click the up arrow on the taskbar to show it.
Tip: You can pin the whale outside of the notification box so that it is always visible on the taskbar. To do this, drag-and-drop the whale icon. Or, right-click an empty porition of the taskbar, select Settings, and choose display options through taskbar settings for notifications.

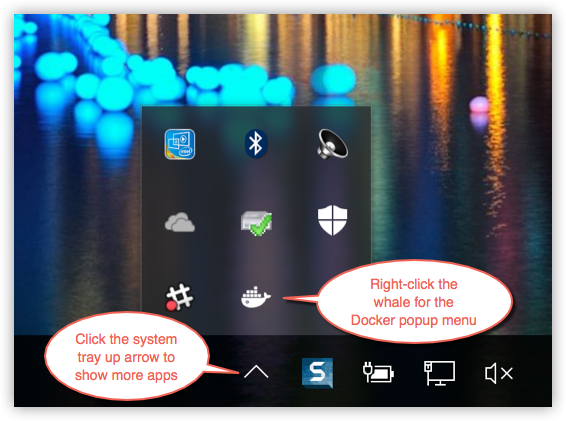
To get a popup menu with application options, right-click the whale:
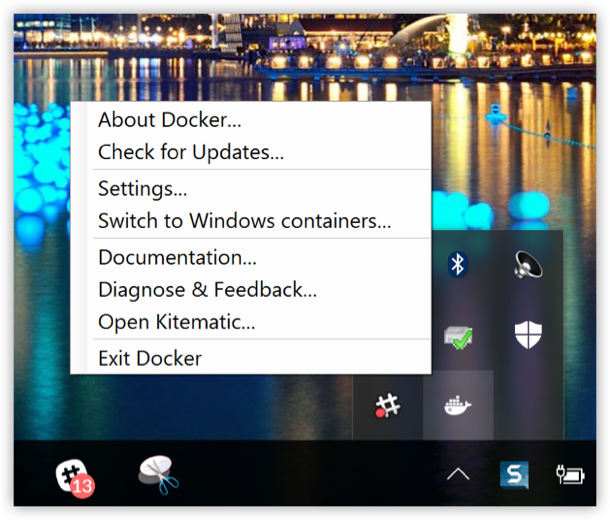
The Settings dialogs provide options to allow Docker auto-start, automatically check for updates, share local drives with Docker containers, enable VPN compatibility, manage CPUs and memory Docker uses, restart Docker, or perform a factory reset.
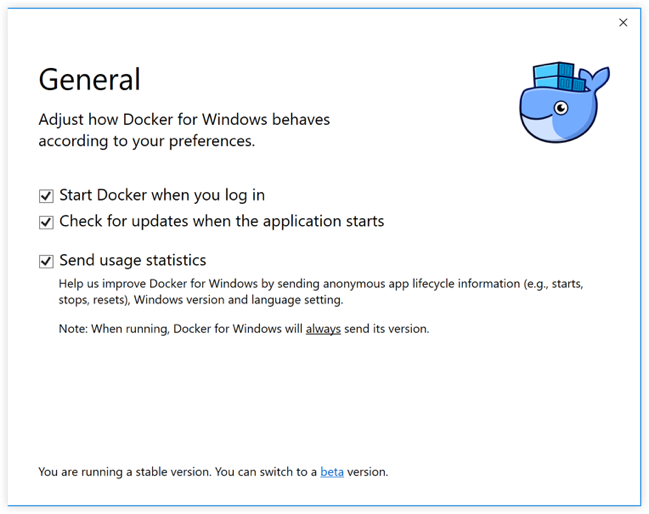
General
-
Start Docker when you log in - Automatically start the Docker for Windows application upon Windows system login.
-
Check for updates when the application starts - Docker for Windows is set to automatically check for updates and notify you when an update is available. If an update is found, click OK to accept and install it (or cancel to keep the current version). Uncheck this option if you do not want notifications of version upgrades. You can still find out about updates manually by choosing Check for Updates from the menu.
-
Send usage statistics - You can set Docker for Windows to auto-send diagnostics, crash reports, and usage data. This information can help Docker improve the application and get more context for troubleshooting problems.
Uncheck any of the options to opt out and prevent auto-send of data. Docker may prompt for more information in some cases, even with auto-send enabled. Also, you can enable or disable these auto-reporting settings with one click on the information popup when you first start Docker.
Shared Drives
Share your local drives (volumes) with Docker for Windows, so that they are available to your containers.
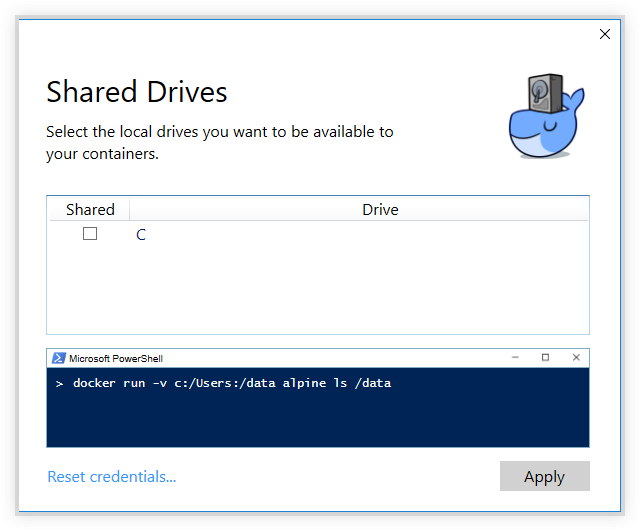
You will be asked to provide your Windows system username and password (domain user) to apply shared drives. You can select an option to have Docker store the credentials so that you don’t have to re-enter them every time.
Permissions to access shared drives are tied to the credentials you provide
here. If you run docker commands and tasks under a different username than the
one used here to set up sharing, your containers will not have permissions to
access the mounted volumes.
Tip: Shared drives are only required for volume mounting Linux containers, and not for Windows containers. For Linux containers, you need to share the drive where your project is located (i.e., where the Dockerfile and volume are located). Runtime errors such as file not found or cannot start service may indicate shared drives are needed. (See also Volume mounting requires shared drives for Linux containers.)
See also Verify domain user has permissions for shared drives in Troubleshooting.
Note: You can share local drives with your containers but not with Docker Machine nodes. See Can I share local drives and filesystem with my Docker Machine VMs? in the FAQs.
Firewall rules for shared drives
Shared drives require port 445 to be open between the host machine and the virtual machine that runs Linux containers.
Note: In Docker for Windows Beta 29 and higher, Docker detects if port 445 is closed and shows the following message when you try to add a shared drive:
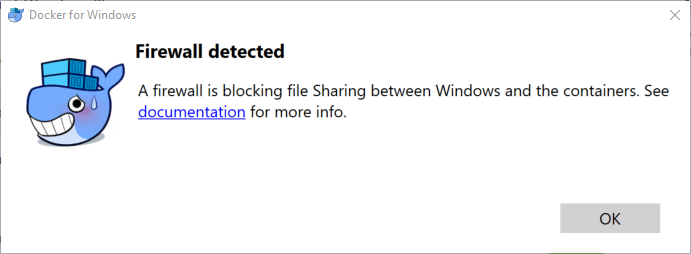
To share the drive, allow connections between the Windows host machine and the virtual machine in Windows Firewall or your third party firewall software. You do not need to open port 445 on any other network. By default, allow connections to 10.0.75.1 port 445 (the Windows host) from 10.0.75.2 (the virtual machine).
Advanced
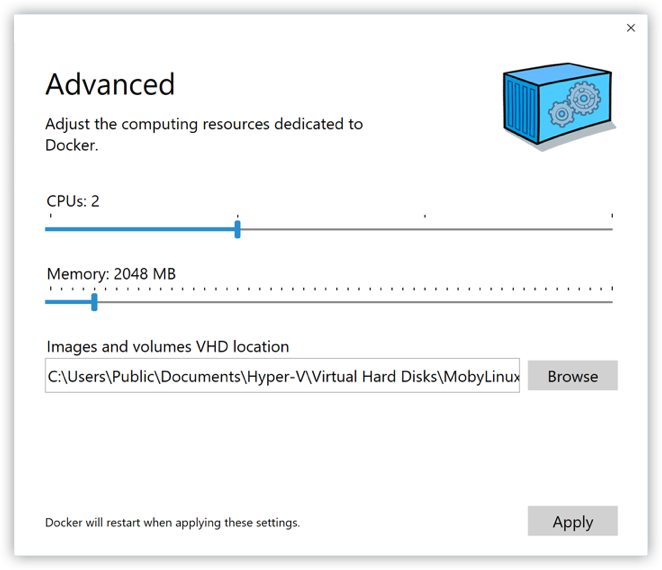
-
CPUs - Change the number of processors assigned to the Linux VM.
-
Memory - Change the amount of memory the Docker for Windows Linux VM uses.
Please note, updating these settings requires a reconfiguration and reboot of the Linux VM. This will take a few seconds.
Network
You can configure Docker for Windows networking to work on a virtual private network (VPN).
-
Internal Virtual Switch - You can specify a network address translation (NAT) prefix and subnet mask to enable internet connectivity.
-
DNS Server - You can configure the DNS server to use dynamic or static IP addressing.
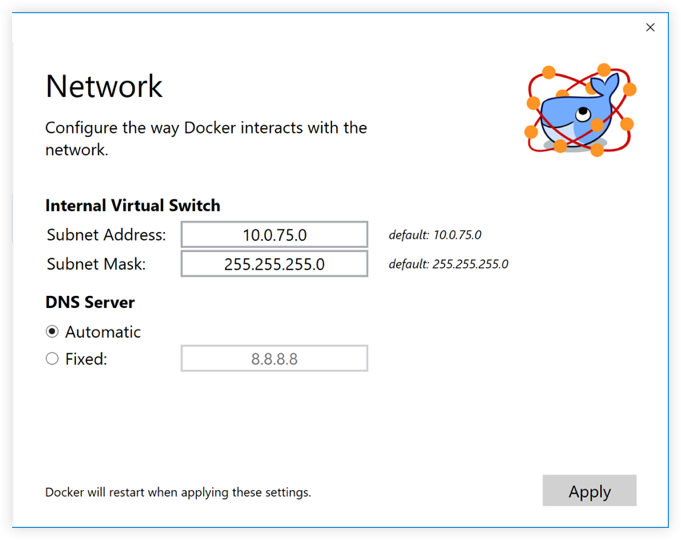
Note: Some users reported problems connecting to Docker Hub on Docker for Windows stable version. This would manifest as an error when trying to run
dockercommands that pull images from Docker Hub that are not already downloaded, such as a first time run ofdocker run hello-world. If you encounter this, reset the DNS server to use the Google DNS fixed address:8.8.8.8. For more information, see Networking issues in Troubleshooting.
Note that updating these settings requires a reconfiguration and reboot of the Linux VM.
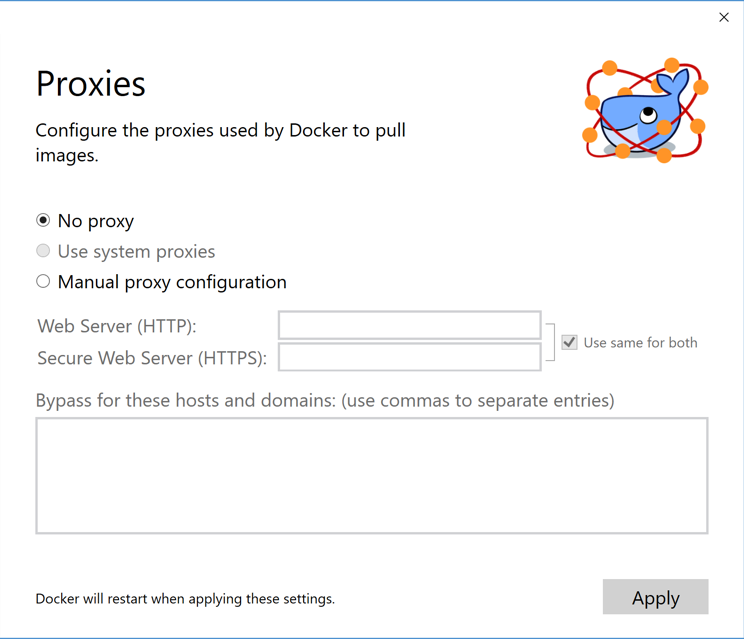
Proxies
Docker for Windows lets you configure HTTP/HTTPS Proxy Settings and automatically propagate these to Docker and to your containers.
For example, if you set your proxy settings to http://proxy.example.com, Docker will use this proxy when pulling containers.
When you start a container, you will see that your proxy settings propagate into the containers. For example:
PS C:\Users\jdoe> docker run -it alpine env
PATH=/usr/local/sbin:/usr/local/bin:/usr/sbin:/usr/bin:/sbin:/bin
HOSTNAME=b7edf988b2b5
TERM=xterm
HOME=/root
HTTP_PROXY=http://proxy.example.com:3128
http_proxy=http://proxy.example.com:3128
no_proxy=*.local, 169.254/16
You can see from the above output that the HTTP_PROXY, http_proxy and no_proxy environment variables are set.
When your proxy configuration changes, Docker restarts automatically to pick up the new settings.
If you have containers that you wish to keep running across restarts, you should consider using restart policies
Docker daemon
You can configure options on the Docker daemon that determine how your containers will run. You can configure some Basic options on the daemon with interactive settings, or switch to Advanced to edit the JSON directly.
The settings offered on Basic dialog can be configured directly in the JSON as well. This version just surfaces some of the commmon settings to make it easier to configure them.
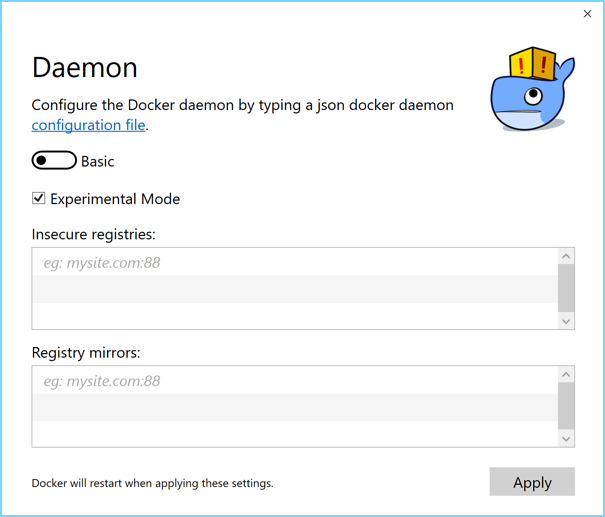
Experimental mode
Starting with Stable 1.13.0 and Beta 34, both Docker for Windows Stable and Beta releases have the experimental version of Docker Engine enabled, described in the Docker Experimental Features README on GitHub.
Experimental features are not appropriate for production environments or workloads. They are meant to be sandbox experiments for new ideas. Some experimental features may become incorporated into upcoming stable releases, but others may be modified or pulled from subsquent Betas, and never released on Stable.
On both Beta and Stable releases, you can toggle experimental mode on and off. If you toggle it off, Docker for Windows uses the current generally available release of Docker Engine.
You can check whether you are running experimental mode or not by typing docker
version in a PowerShell. Experimental mode is listed under Server data.
If Experimental is true, then Docker is running in experimental mode, as
shown here. (If false, Experimental mode is off.)
PS C:\Users\Vicky> docker version
Client:
 Version:      1.13.0-rc4
 API version:  1.25
 Go version:   go1.7.3
 Git commit:   88862e7
 Built:        Sat Dec 17 01:34:17 2016
 OS/Arch:      windows/amd64

Server:
 Version:      1.13.0-rc4
 API version:  1.25 (minimum version 1.12)
 Go version:   go1.7.3
 Git commit:   88862e7
 Built:        Sat Dec 17 01:34:17 2016
 OS/Arch:      linux/amd64
 Experimental: true
Custom registries
Also starting with with Beta 34 and Stable 1.13.0, you can set up your own registries on the Basic Daemon settings.
As an alternative to using Docker Hub to store your public or private images or Docker Trusted Registry, you can use Docker to set up your own insecure registry. Add URLs for insecure registries and registry mirrors on which to host your images. (See also, How do I add custom CA certificates? in the FAQs.)
Edit the daemon configuration file
The Advanced daemon settings provide the original option to directly edit the JSON configuration file for the daemon.
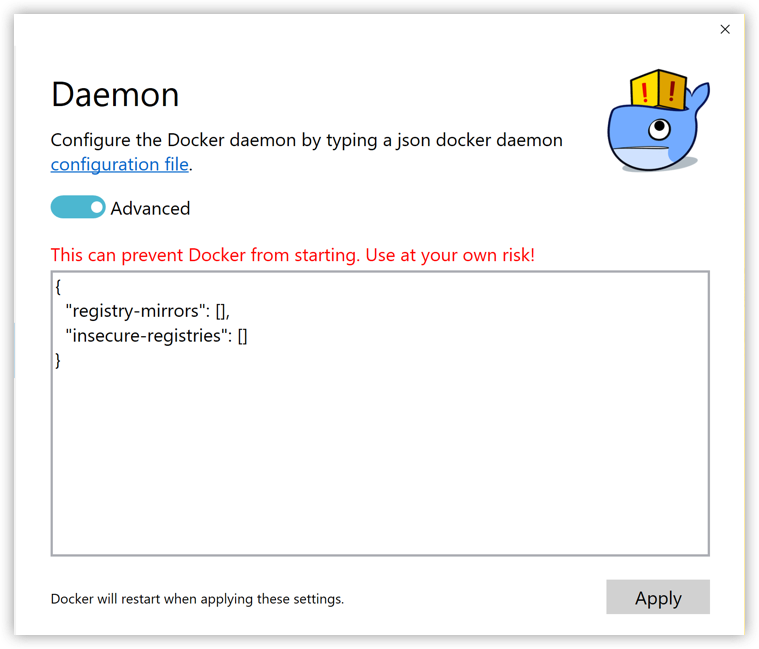
For a full list of options on the Docker daemon, see daemon in the Docker Engine command line reference.
In that topic, see also:
Note that updating these settings requires a reconfiguration and reboot of the Linux VM.
Switch between Windows and Linux containers
Starting with Beta 26 and Stable 1.13.0, you can select which daemon (Linux or Windows) the Docker CLI talks to. Select Switch to Windows containers to toggle to Windows containers. Select Switch to Linux containers.
Microsoft Developer Network has preliminary/draft information on Windows containers here.
For a full list of options on the Docker daemon, see daemon in the Docker Engine command line reference.
In that topic, see also:
Getting started with Windows containers
If you are interested in working with Windows containers, here are some guides to help you get started.
-
Build and Run Your First Windows Server Container (Blog Post) gives a quick tour of how to build and run native Docker Windows containers on Windows 10 and Windows Server 2016 evaluation releases.
-
Getting Started with Windows Containers (Lab) shows you how to use the MusicStore application with Windows containers. The MusicStore is a standard .NET application and, forked here to use containers, is a good example of a multi-container application.
Disclaimer: This lab is still in work, and is based off of the blog, but you can test and leverage the example walkthroughs now, if you want to start experimenting. Please checking back as the lab evolves.
-
This troubleshooting issue is useful for understanding how to connect to Windows containers from the local host: Limitations of Windows containers for
localhostand published ports
About the Docker Windows containers specific dialogs
When you switch to Windows containers, the Settings panel updates to show only those dialogs that are active and apply to your Windows containers:
Keep in mind that if you set proxies or daemon configuration in Windows containers mode, these apply only on Windows containers. If you switch back to Linux containers, proxies and daemon configurations return to what you had set for Linux containers. Your Windows container settings are retained and become available again when you switch back.
The following settings are not available in Windows containers mode, because they do not apply to Windows containers:
Giving feedback and getting help
To get help from the community, review current user topics, join or start a discussion, log on to our Docker for Windows forum.
To report bugs or problems, log on to Docker for Windows issues on GitHub, where you can review community reported issues, and file new ones. As a part of reporting issues on GitHub, we can help you troubleshoot the log data. See the Diagnose and Feedback topic below.
To give feedback on the documentation or update it yourself, use the Feedback options at the bottom of each docs page.
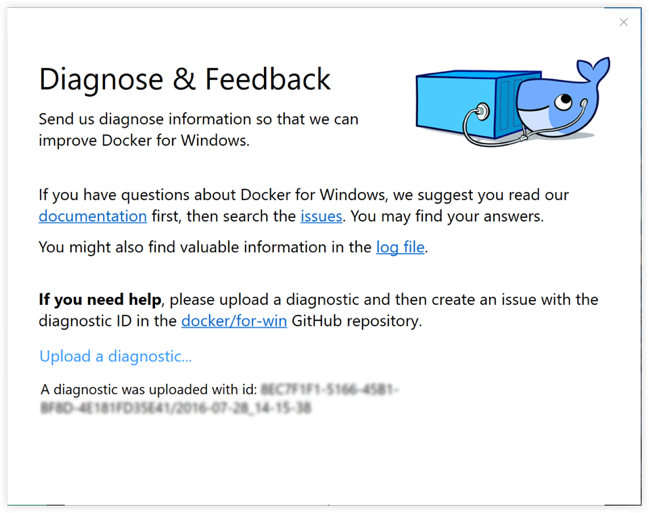
Diagnose and Feedback
If you encounter problems for which you do not find solutions in this documentation, searching Docker for Windows issues on GitHub already filed by other users, or on the Docker for Windows forum, we can help you troubleshoot the log data.
Select Upload a diagnostic.
This uploads (sends) the logs to Docker.
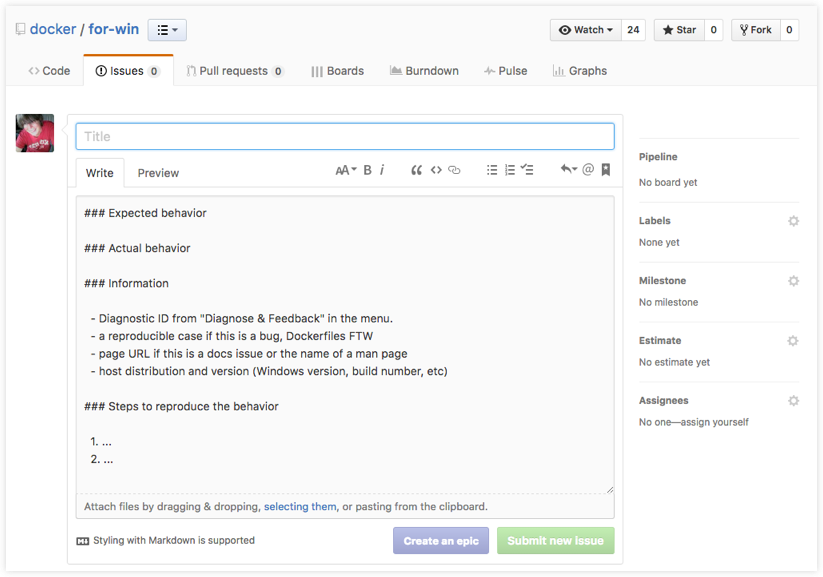
To create a new issue directly on GitHub, open Docker for Windows issues on GitHub in your web browser and follow the instructions in the README. Click New Issue on that page to get a “create new issue” template prepopulated with sections for the ID and summary of your diagnostics, system and version details, description of expected and actual behavior, and steps to reproduce the issue.
Reset
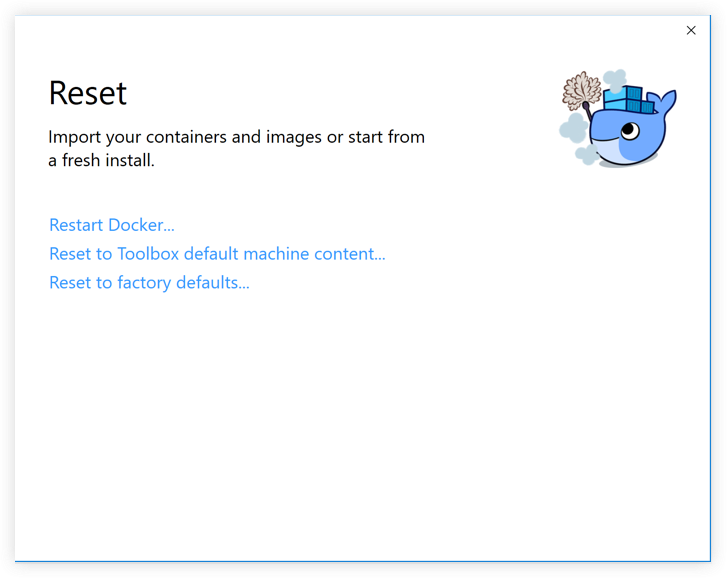
-
Restart Docker - Shuts down and restarts the Docker application.
-
Reset to Toolbox default machine content - Imports containers and images from the existing Docker Toolbox machine named
default. (This option is enabled only if you have Toolbox installed.) The VirtualBox VM will not be removed. -
Reset to factory defaults - Resets Docker to factory defaults. This is useful in cases where Docker stops working or becomes unresponsive.
Where to go next
-
Try out the tutorials and sample app walkthroughs at Learn Docker, including:
-
Learn Docker basics in Getting Started with Docker
-
Learn how to define and deploy a Docker stack to a swarm (deploy multiple containers as services and use new Compose Version 3 features)
-
-
Dig in deeper with Docker Labs example walkthroughs and source code.
-
For a summary of Docker command line interface (CLI) commands, see the Docker CLI Reference Guide.
-
Check out the blog post Introducing Docker 1.13.0.
 Feedback? Suggestions? Can't find something in the docs?
Edit this page ● Request docs changes ● Get support
Rate this page: